I needed to break down my bascinet for some maintenance and modification, so I thought I would share for anyone interested in a deeper look at the helmet’s components. Learning how to break down, conduct maintenance on, and put your armor back together is an important skill. We don’t always have access to the gifted professionals who create these wearable works of art for us, so getting to know your gear is something that shouldn’t intimidate you. I notice people who aren’t as familiar with armor, or who may even own armor but don’t dare take it apart, tend to think of things like rivets and sewn components as permanent (read: not user-serviceable) and that’s simply not the case. Rivets can be tightened, or drilled out and replaced. Threads can be cut and re-sewn. These are all things that would be considered normal maintenance in the working life of a piece of armor. Straps break, pivots loosen, mail rusts, liners get awfully disgusting, Re-sewing a liner back into a helmet is a mere 20 minute evolution and requires minimal tools and supplies.
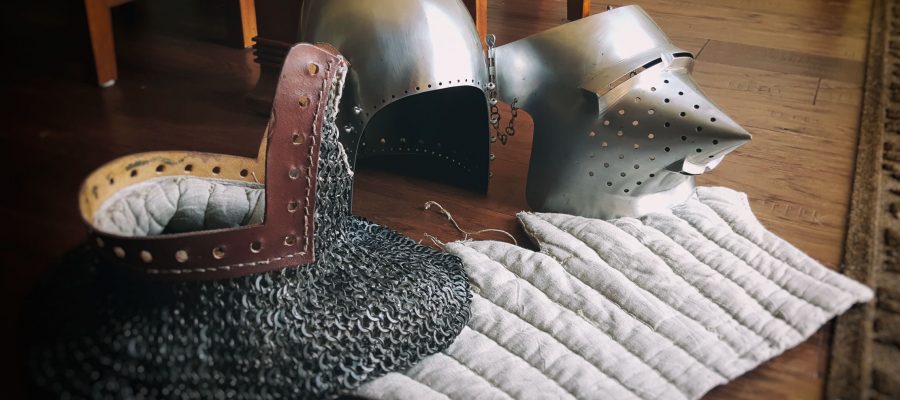
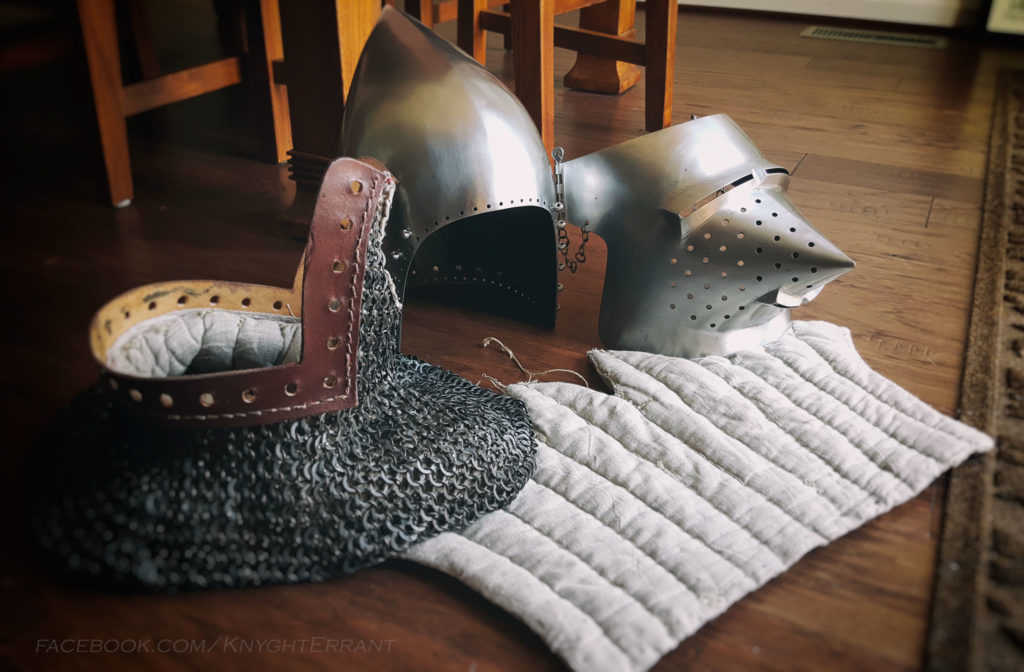
Here are the constituent components of the bascinet: the aventail (with liner installed), the skull, the visor, and the skull liner. I had previously modified the liner to make it lobed and adjustable. The original lining it came with was continuous and non-adjustable, and my head sank a little bit too far into the helmet. When I first modified it, I didn’t get it quite where I wanted it. My head still sat a little too deeply into the skull and at times that could allow contact between the steel of the helmet and my cranium, instead of properly suspending my head somewhere in the void of the bascinet skull. Ultimately, I must have been distracted by some other project at the time and left the liner in its ‘almost but not quite’ state. I ended up coming back to this since I needed to tighten the pivots. In order to get at the pivots from the inside the liner needs to be removed and I figured I would get everything done that I needed to do. Unfortunately, I didn’t take any photos of me tightening the pivots, but it’s simply a matter of peening the rivets down a little more until you get the desired tightness. Something to keep in mind is that a visor can apply a lot of leverage to a pivot, so even a pivot that is immovable by hand may still easily swing with the visor in place.
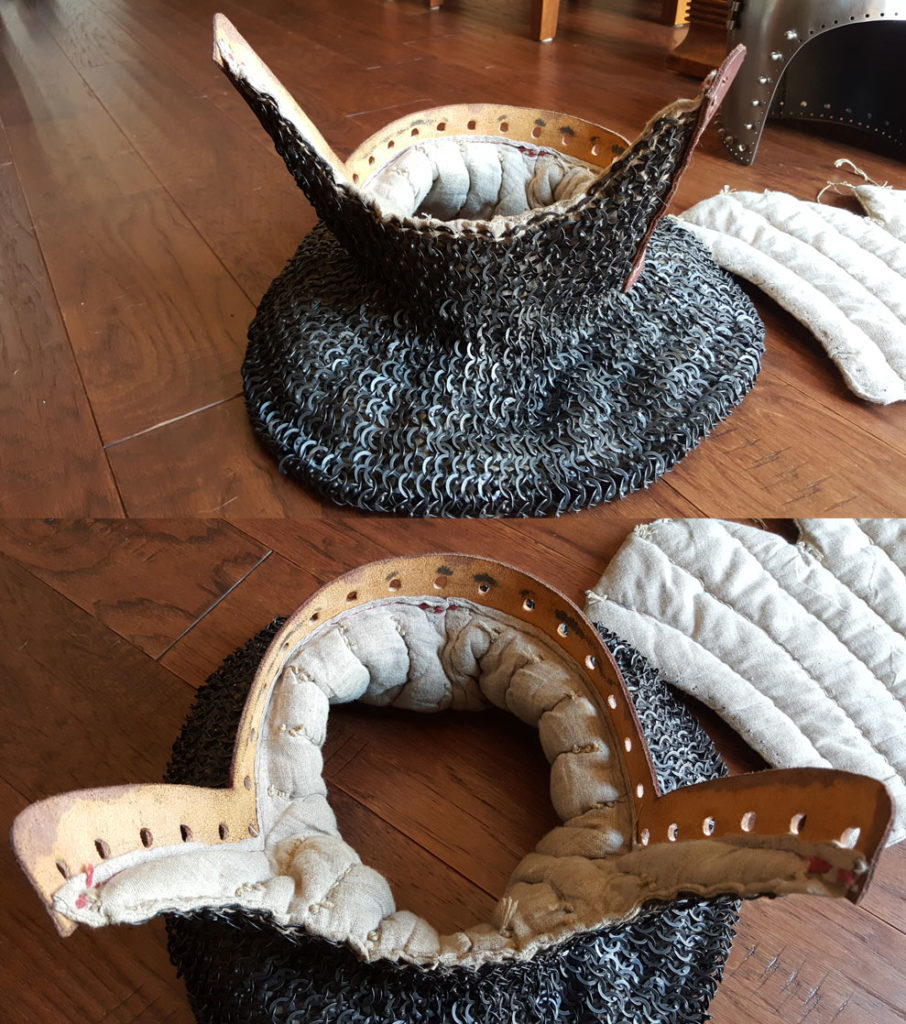
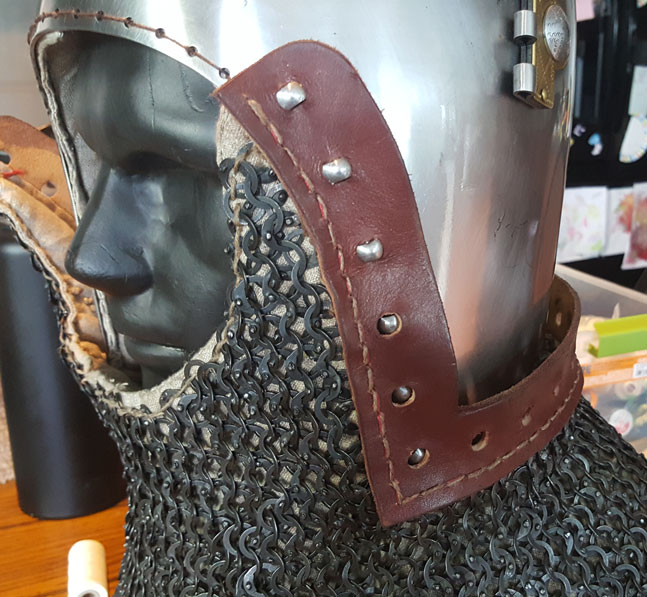
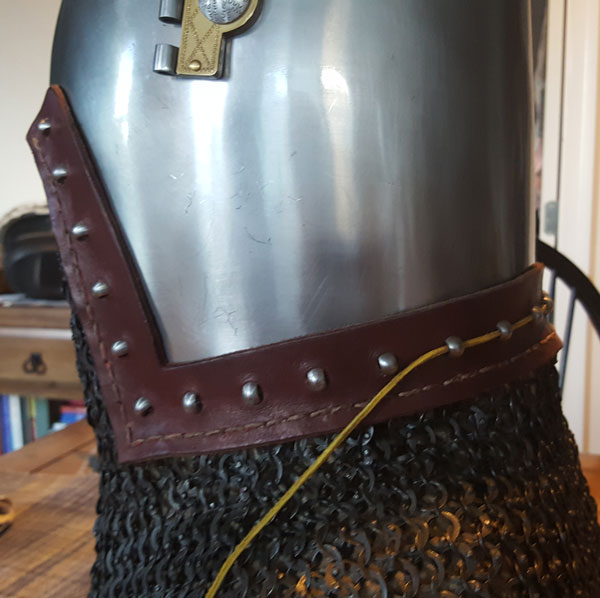
Here is a closer look at the aventail. To get the aventail off, you simply undo the knot on the yellow cord (leather in my case) that passes through the vervailles (we’ll get a closer look at this later in re-assembly). Un-thread the cord from the vervailles and peel the aventail leather off. The aventail and its liner are a self-contained unit. This makes removal of the aventail simple. If you needed to deep clean the mail or conduct heavy repairs, you would simply cut the thread along the perimeter of the liner and remove it. Then you do what needs to be done, and re-sew it on.
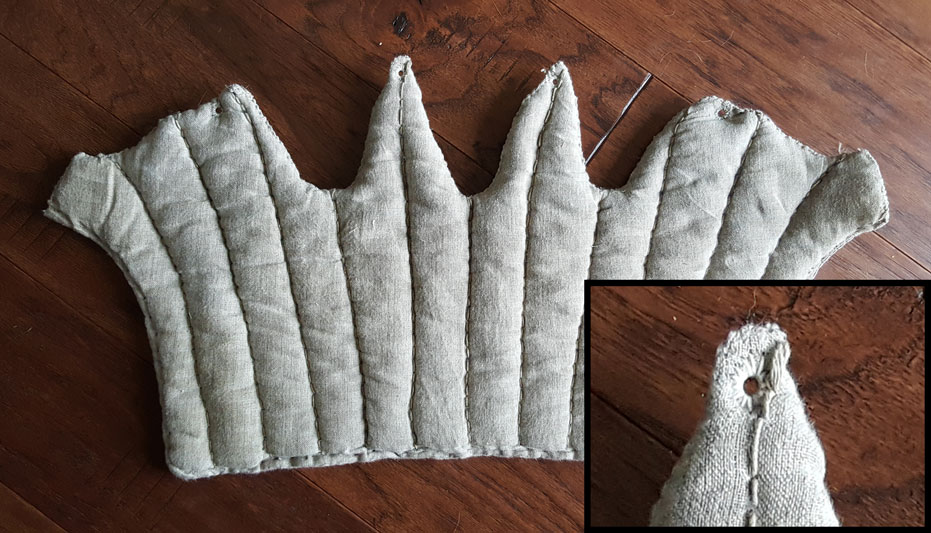
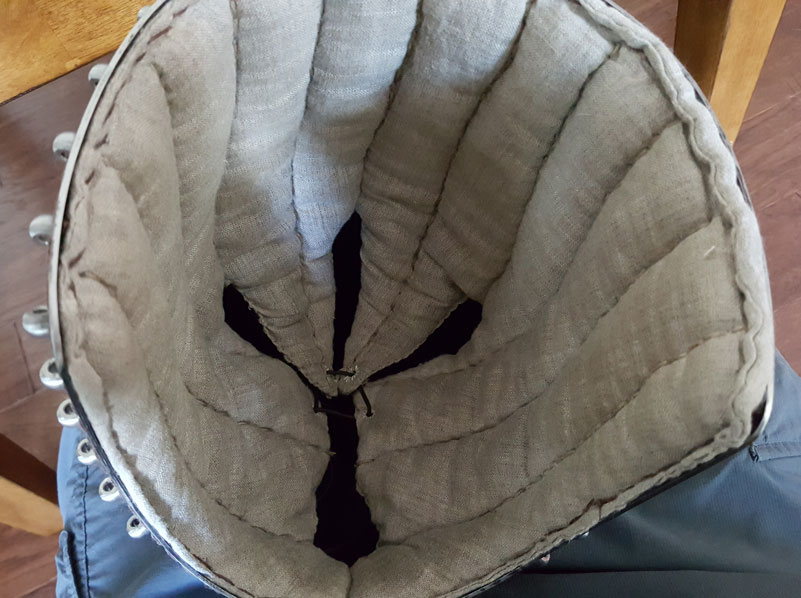
To remove the skull liner, the thread is again simply cut and removed and the liner will come away free from the rest of the bascinet. Here you can see the overall shape of the liner as I’ve modified it. When I originally received it, the liner was continuous and was not adjustable. In order to get it to sit exactly where I wanted it, I wanted to make it adjustable. To accomplish that, I cut the triangular shaped lobes you see on the upper edge of the liner and sewed eyelets into the peak of each of the four lobes.
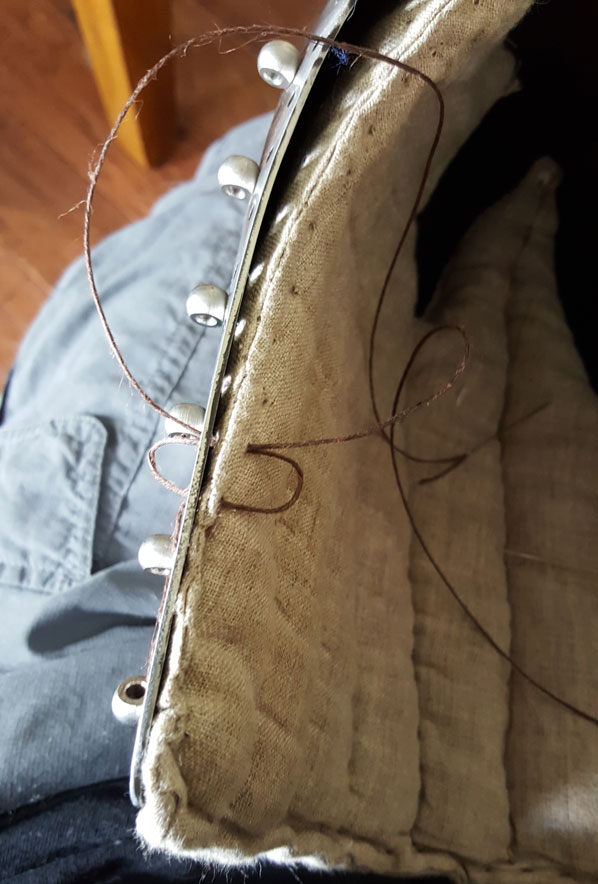
Re-attaching the liner is a matter of sewing it back on. I use a heavy waxed linen thread and I run a needle at either end of the thread to produce a saddle-stitch all the way around the edge of the skull and liner. As a thread runs out, I knot it to seal it off in between the skull and liner so that the resulting knot is invisible and then continue with a new length of thread.
With the liner completely sewn back in place you can see how the lobes at the top of the skull now sit. They’re not quite symmetrical, but I was trying to avoid taking the liner apart and re-quilting it, so I was working within the confines of existing runs of quilting. The end result is functionally what I want and need. Each lobe has an eyelet at the peak through which a cord passes. By tightening or loosening this cord and knotting it at the desired tension, you can control where your head will ultimately sit and be suspended within the helmet.
The aventail can now be re-attached. Before doing that, it’s wise to remove any corrosion that may have built up underneath the aventail leather since it will not be easily accessible during normal cleaning. The aventail leather is aligned with the verveilles and pressed into place. If fitted properly, it’s actually a very tight fit and the aventail will not fall off without really trying to peel it off the verveilles. A lot of people view the attachment cord as a major vulnerability on a bascinet. A well-fitted leather won’t just immediately fall away even if the cord is severed, but it is still a vulnerability if not verveille covers are present.
Once the aventail cord is re-attached, a simple knot will prevent it from backing out through the verveilles. The visor is then replaced and the helmet is back in business! The liner can now be adjusted to my head properly and results in a good suspension of my skull within the skull of the bascinet. A wipe down with an oily rag is advisable at this point since you’ve had your hands all over the the steel components of the helmet and visor during this entire process.




2 Comments
Leave your reply.